Pages

Thursday, December 10, 2015

Cleaning Slime

.

Awesome! Make your own Cleaning Slime

Take 1 tablespoon of white (Elmers) glue and add about 1 spoon full of water and mix together. Then in another cup, put 2 tablespoons of borax and 2 tablespoons of water. Pour the glue solution and the borax solution together and you get slime. Add some food coloring to the glue first, if you want a cool color. Use the mold of your choice, shallow plastic container, etc. Can be re-used many times. When it gets filled with the gunk you have been cleaning, throw it out and make some more!!


Common Cold Cure


Cool Whip Cookies


Wednesday, December 9, 2015

THIS Is How You Make The Ultimate Chocolate Chip Cookie Skillet


It’s no secret that we love chocolate chip cookies. But why make individual cookies when you can bake one big cookie? We wanted to craft a recipe that would bake perfectly as one giant cookie. While it may be possible to bake these massive cookies in a pie pan, I couldn’t resist pulling out the cast iron skillet for that great rustic look. What’s better, is because of this method of baking, you end up with a nice little crater in the cookie that just begs for a scoop of ice cream.
Unlike the thinner cookie counterpart, we didn’t have to worry quite as much about how the cookie would hold up on its own. We could make the chip nice and chewy, and there wasn’t a need to refrigerate the dough overnight. We also wanted to give it with a nutty flavor without actually adding nuts. The solution, of course, was to brown the butter first. From there, we relied once more on a bar of chocolate chopped ourselves. Without all the scooping, it was easy and quick enough to assemble all of the ingredients. Keep reading below for this great recipe…To View Recipe Click Here

Chocolate Italian Love Cake


The Italians are known to be lovable. Italy is the place to be for a budding romance. Italy is the place to be if you’re looking for it. So why not fall in love with this Chocolate Italian Love Cake by Chew Nibble Nosh? Everyone will love this cake. It’s yummy and impressive for being so simple to put together. Make it ahead time because the longer you let it hang in the fridge, the better it actually tastes! Start by mixing a box of chocolate cake mix together. Add some ricotta cheese, eggs, sugar, and vanilla together. Pour the cheese mixture on top of the cake batter, pop it in the oven, and wait for the magic to happen! Click the link below to see the recipe:

Recipe Link –> Chocolate Italian Love Cake

Thursday, December 3, 2015

Peppermint Bark


Peppermint Bark:


Serves 6 to 8


Ingredients:

2 cups of White Chocolate Morsels
25 Hard Peppermint Candies, crushed with a rolling pin


Directions:


1) In a microwave safe bowl, add the chocolate morsels and microwave until melted.


2) Once the chocolate is all melted, add half of the crushed peppermint cadies and spread on the parchment paper lined baking sheet. Sprinkle the top evenly with the remaining crushed candies and let it set for 1 hour.


3) After 1 hour, brake apart into large pieces. 


Read more: http://www.cooking-with-us.com/peppermintbark.php#ixzz3tJZkpjSx

Tuesday, December 1, 2015

The Classic Peanut Butter Version Is Yummy, But This Cookie Dough Buckeye Is Out Of This World!


You might want to loosen your belts for this one, ‘cause it’s a doozy. You know that moment when you’re making chocolate chip cookies and slowly, but surely munching on the yummy cookie dough, wondering whether you like that or the baked cookies better? That happens to us every time, but we decided to take things to the next level and make a treat entirely devoted to the uncooked goodness – don’t worry, no raw eggs to worry about here!
These cookie dough buckeyes are sinfully delicious and we can’t get enough of them. The dough is a cinch to make and then all you have to do is dip each adorable buckeye into some melted chocolate and let them all cool. Whether you share these with your friends and family, or accidentally eat most of them before they make it to the table, these bite-sized goodies are one of the best things you’ll make this season!

COOKIE DOUGH BUCKEYES


Get the recipe from here...http://12tomatoes.com/cookie-dough-buckeyes/?utm_source=12t-12t&utm_medium=social-fb&utm_term=113015&utm_content=link&utm_campaign=cookie-dough-buckeyes&origin=12t_12t_social_fb_link_cookie-dough-buckeyes_113015

Saturday, November 28, 2015

CHOCOLATE NUT CLUSTERS

Once you try this ridiculously easy and delicious dessert, you’ll never want to go back to your more complicated recipes! These chocolate nut clusters are rich and silky, with the perfect amount of crunch to balance everything out. Plus, there’s just the right amount of bite from the salted peanuts, but since the recipe also calls for unsalted, the flavor isn’t overwhelming.
We absolutely love coming up with new and exciting ways to put our slow cooker to good use, and it’s quite possible that this is our favorite slow cooker recipe yet. The result is the perfect bite-sized treat and we didn’t have to slave away to make it! The only downside that we can see so far is that we are very tempted to goggle down all the clusters as soon as possible. If you think this could be you, make sure you’re surrounded by people who will share them with you (or save them for yourself, we won’t say anything)we’re sure you’ll have lots of volunteers!

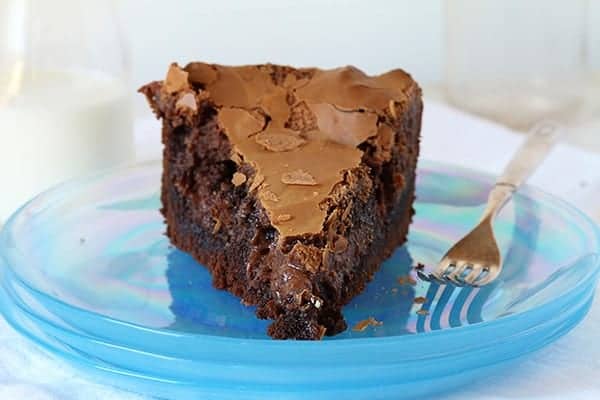
chocolate ooey gooey cake

While I really enjoyed this chocolatey richness of this dessert, I think “taste wise” the same results can be achieved by simply making brownies or a rich chocolate cake.  However, I will happily taste-test my theory a few more times.


To take and read More, Click the following Link:http://iambaker.net/chocolate-ooey-gooey-cake/

Make your own yellow cake mix from scratch at home

Check out the following recipe for making your own yellow cake mix from home,  and may even be better then the box cake mix you buy...


To take and read more check the following link out...http://iambaker.net/homemade-yellow-cake-mix/

Wednesday, November 25, 2015

Thanksgiving Recipes


Search This Site  The Web
 
Visit Our Online Store, Click Here:
Don't forget to take a moment and check out the different 
Brine Recipe's:


Thanksgiving recipe's & Video's:
Here are a few different thanksgiving recipe's & video's we hope that you find handy and delicious. And that you and your whole family will take and enjoy and continue to use time and time again for future thanksgivings to come, if you have a favorite of your own please feel free to submit it free of charge for others to try. 
Here is the link to the Step By Step Thanksgiving Recipe Videos: If you would like here is the direct link for some simple Cheesecake Step By Step Video's.  Visit our Dessert Page for some great quick and simple desserts for your Thanksgiving supper or for anytime Here is one more Link for some more simple Holiday Step By Step Video's.


Read more: http://www.cooking-with-us.com/thanksgiving5.php##ixzz3sX4pZoDG

Brown Bag Turkey

Print Friendly and PDF 


Brown Bag Turkey 

For the Most Juicy Turkey EVER!


INGREDIENTS 

SERVINGS 6-8
1 (18 -20 lb) whole turkey
2 stalks celery (roughly chopped)
1 carrot (roughly chopped)
1 onion (cut into quarters)
3 -4 crushed garlic cloves
olive oil


DIRECTIONS


Take everything out of the turkey. There will be a giblet bag and some other stuff.
Next add vegetables to the inside of the turkey. You dont even have to peel anything. This is easy because the veggies are just for flavor -- you are going to throw them away later.
Take the onion and cut it into quarters.
Chop a nice long carrot.
Do the same with a couple stalks of celery.
Add several cloves of garlic that you mash between a broad kitchen knife and the kitchen counter.
Throw it all inside the turkey.
Then rub the turkey all over with olive oil -- Make sure the whole bird is covered in olive oil.

Put the turkey in a roasting pan and cover it with a large brown paper bag.
Staple shut. If you have a huge turkey use two paper bags at each end. It wont stick to the bird because of the olive oil.

Sprinkle the bag all over with water.
Place into pre-heated 375 F oven. ON THE MIDDLE RACK.

The bag wont burn because paper burns at 451 and we're at 375 degrees.
The advantage of the brown paper bag over the reynolds cooking bag is that the paper breathes so the turkey ROASTS. In the reynolds bag the turkey STEAMS, giving it a different taste.

Roast for 13-15 minutes per pound.
When you think it's ready, shove a meat thermometer through the bag and into the turkey and give it a minute to register. Make sure it doesnt touch the bone.
The thermometer should register between 163-170 degrees.
Remove from oven, cut away the bag and remove the basting pan.
Do not throw out the drippings!

To make the gravy, strain the pan juices into a really big pot. Any juices that accumulate on the turkey platter get poured into the pot.
Add six oz. of boiling chicken broth and 1/8 cup of corn starch to the gravy to thicken it up. Cook on low heat and stir and cook and stir.

If it seems it isnt going to be thick enough, add a little more corn starch.

shared with permission: food. com


Read more: http://www.cooking-with-us.com/brownbagturkey.php#ixzz3sX4Vull8

Thanksgiving Turkey with Rub and Gravy Recipe

Print Friendly and PDF 


Thanksgiving Turkey with Rub and Gravy Recipe

Ingredients

Rub:
2 teaspoons kosher salt
1 teaspoon freshly ground black pepper
2 teaspoons dried thyme
2 teaspoons dried rosemary
1 teaspoon dried sage
1/2 teaspoon garlic powder

Turkey:
1 (14 to 16 pound) turkey, rinsed, patted dry inside and out (neck, heart, and gizzard reserved
for stock)
Salt and freshly ground black pepper
2 tablespoons olive oil

Gravy:
Turkey or chicken stock
2 garlic cloves, thinly sliced
2 shallots, finely chopped
3 tablespoons all-purpose flour
2 tablespoons fresh lemon juice
1/2 cup sour cream
Kosher salt and freshly ground black pepper


Directions

Preheat the oven to 325 degrees F.

Mix all of the dry rub ingredients in a small bowl.

Put the turkey on a rack in a roasting pan.

Generously season the turkey cavity with salt and pepper, to taste. Brush the turkey with olive oil, and rub it with the seasoning mixture. Tie the legs together loosely to hold their shape, and tuck the wing tips under.

Roast the turkey until an instant-read thermometer inserted into the thickest part of thigh registers 165 to 170 degrees F, about 3 hours.

Transfer the turkey to a platter. Tent it very loosely with foil, and let it rest for at least 30 minutes (the internal temperature will rise 5 to 10 degrees). Reserve the juices in the pan.

Gravy: Scrape the juices and browned bits from the roasting pan into a large glass measuring cup. Spoon off the fat, reserving 2 tablespoons. If necessary, add enough stock to the juices to measure 1 2/3 cups.

Heat the reserved 2 tablespoons fat in a heavy, large saucepan over medium-high heat. Add the garlic, and shallots, and saute for 2 minutes. Add the flour and whisk until golden, about 4 minutes. Add the degreased pan juices, and the 2 cups stock. Bring to a boil, whisking until smooth. Reduce the heat and simmer until the gravy is reduced to the desired consistency, about 4 minutes. Whisk in the lemon juice, and the sour cream. Season the gravy with salt and pepper, to taste. Pour the gravy into a serving bowl. Carve the turkey and arrange it on a serving platter. Serve the turkey with the gravy.

From Food.com


Read more: http://www.cooking-with-us.com/thanksgivingturkeywithrubandgravyrecipe.php##ixzz3sX4Ehbgg

Tip On Ice Removal From Sidewalks And Driveways

Here is a really simple tip  to prevent ice build up in the future on your front walk or other walk way or surface . Hope that you like and find it useful


Tuesday, November 24, 2015

Guidelines For Brining Turkey


The secret to perfect juicy chicken and turkey is simple - Brine them before cooking!

This is the secret that chefs never tell you about. It's very easy and economical, and requires no special cookware. Brining is like a marinade, as it keeps food moist and tender. Brining or salting is a way of increasing the moisture holding capacity of meat resulting in a moister product when it is cooked. Salt changes the structure of the muscle tissue in the meat which allows it to swell and absorb water and flavorings which results in a tender turkey or chicken once cooked.

Who wouldn’t want to eat a tender, moist, and flavorful turkey for their Thanksgiving dinner? Give it a try!
 
brining thanksgiving turkey in a large bucket
Turkey being brined in a large 5-gallon bucket.


Selecting the Turkey for Brining:

When purchasing a turkey for brining, choose a natural turkey (not a self-basted bird that's been injected with a solution of salt and other flavorings). Look for the words "natural" or "no additives added." Choose a 12- to 20-pound turkey. If the turkey is frozen, thaw according to the package directions before brining.
Remove and discard any leg restraints from the purchased turkey. Remove the giblets from the neck cavity and the neck from the body cavity (save in the refrigerator or freezer for making Perfect Turkey Giblet Gravy. Trim away any large areas of fat or excess skin around the body cavity, and cut off the tail.
Rinse thoroughly, inside and out, and pat dry with paper towels.

Choose a container large enough to hold your turkey and brine mixture, plus it must be able to fit either in your refrigerator or a large cooler.
Your turkey is now ready for brining.


Poultry Brine Recipe:

Recipe Type: Poultry and Chicken
Yields: enough for one (1) whole turkey
Prep time: 30 min


Ingredients:
For each gallon of cold water used in the brine, add the following:
3/4 cup coarse kosher salt
3/4 cup granulated sugar
1 cup boiling water
1 gallon cold water
1 tablespoon black pepper


Optional ingredients for flavor:
Apple juice or cider

Bay leaves
Favorite dried herbs and spices (sage, oregano, thyme, basil, cloves, cinnamon, etc.)
Cracked black peppercorns
Lemon or orange slices
Crushed garlic cloves
Beer
Sugar (granulated, brown sugar, or maple syrup)


Equipment Needed:
  • Whole Turkey: A heavy-duty large food-grade plastic, stainless steel, or glass container (5- to 6-gallon). Large brining bags may also be used. Weight with a plate, if necessary, to keep the meat fully covered by the brine. See above How To Refrigerate Poultry During Brining.
  • Chicken: Stainless-steel bowl or re-sealable plastic bag can work as a brining container, as long as the poultry is fully submerged. Weight with a plate, if necessary, to keep the meat fully covered by the brine.

Determine How Much Brine Is Needed:
 
To determine how much brine you'll need, place the poultry (chicken or turkey) to be brined in your chosen container. Add water to cover. Remove the poultry and measure the water.


Brining Directions - How To Make Poultry Brine:

One of the great things about brining is that there are so few rules. Most brines start with water and salt — traditionally, 3/4 pound of salt per gallon of water, but since we’re not concerned with the brine as a preservative, you can cut back on the salt. The amount of brining time is likewise not set in stone. Even a little brining is better than none.

Dissolve salt and sugar in the boiling water. Add it to the cold water; add pepper and stir to combine.
What type of salt to use in brine: Kosher salt and table salt (without iodine) are the most common salts used in brining. Sea salt can be used, but it tends to be quite expensive. I usually use coarse kosher salt.
A cup of table salt and a cup of kosher salt are NOT equal. Table salt weighs approximately 10 ounces per cup and kosher salt weighs approximately 5 to 8 ounces per cup (depending on the brand). If using kosher salt in a brine, you must use more than 1 cup to achieve the same "saltiness" you would get from 1 cup of table salt. To learn about different types of salt and how to use them, check out the article =Salt - The Spice of Life=.


container of saltThis chart shows substitutions for the two most popular brands of kosher (coarse) salt for 1 cup of ordinary table salt (remember without iodine) when brining poultry.
Table Salt (without iodine) - use 1 cup
or
Diamond Crystal Kosher Salt - use 2 cups
or
Morton Kosher Salt - use 1 1/2 cups
 

What flavorings to add to brine:
You can add flavor in all sorts of forms such as herbs and spices. Use brown sugar, honey, or molasses in place of the sugar (some sweetness tends to offset a saltiness the brine might otherwise impart). You can also use apple juice, cider, orange juice, beer, wine, rice wine vinegar, apple cider vinegar, stock, tea, or other liquids to replace some or all of the water. You can also put together decidedly Oriental flavorings with soy sauce or the Japanese rice wine mirin. In other words, be creative with the flavorings!


Refrigerate Turkey While Brining - Refrigeration is absolutely required during brining:
The main logistical problem with brining is that you need a container that is large enough to submerge your turkey in the brine, but will fit in your refrigerator or cooler. The meat and brine solution must be kept below 40 degrees F. at all times. Since brining does not preserve meat, the turkey and brine must be kept refrigerated at all times.
Refrigerator -  If storing the poultry in the refrigerator during brining, check to make sure that the container will fit in your refrigerator first! A container large enough to hold a whole turkey might be too big for your refrigerator.
Picnic Cooler -  First, choose a cooler that is large enough to keep the turkey completely submerged during the brining process. It is important to thoroughly clean and sanitize the cooler before and after use.
You must keep the poultry and brine cold without diluting the mixture when using a cooler. Put the meat and brine directly in the cooler, then place Ziploc bags filled with ice or reusable gel packs into the brine solution.
Another approach is to put the turkey and brine into a turkey oven roasting bag or brining bags inside the cooler, and then pack ice or gel packs around the bag.
Monitor the temperature of the cooler (using a Digital Thermometer) to make sure it stays below 40 degrees F. at all times.

Turkey Brining Bags:
Use large brining bags. These brining bags are very easy to use and take up less room in your refrigerator or cooler. Bags are sold large enough to hold a 20-pound turkey. Every now and then, turn the bag around and upside down to ensure even brining.
For brining chicken, I use either small brining bags or regular re-sealable plastic bags.

How Long To Brine Poultry:

It is possible to end up with meat that's too salty for your taste. To avoid this, brine on the low end of the time range on your first attempt. You can always brine longer next time, but there's no way to salvage a piece of meat that's been brined too long.
 
Whole Chicken (4 pounds)
4 to 12 hours
Chicken Pieces
1 to 1 1/2 hours
Whole Turkey
1 to 2 days
Turkey Breast
5 to 8 hours
Cornish Game Hens
1 to 2 hours

Do not salt brined poultry before cooking. Cook poultry according to your favorite recipe. Do not overcook your brined poultry. Once brined, the poultry cooks faster, so be careful and use a Meat Thermometer inserted into the thickest part of the meat.


Turkey Cooking Techniques:
Thanksgiving TurkeyGuidelines For Roasting a Whole Turkey - Learn how to safely and easily prepare and roast your turkey. Oven-Roasted Turkey Tips.
Cajun Fried Turkey - This way of cooking your turkey is anything but greasy as the deep-frying process seals the outside and the turkey remains incredibly juicy, while the skin gets wonderfully crispy.
Barbecued Turkey - Avoid the mess in your oven and use your barbecue.
Outdoor Turkey Pit Cooking Recipe - Turkey In the Hole Recipe - This style of pit cooking is also know as "Bean Hold Cooking." If you have the time and place to cook your holiday turkey in an outdoor pit, wouldn't this make a great Thanksgiving or Christmas turkey dinner.
Smoked Turkey - Enjoy the delicious smell and taste of the smoked turkey.


Planning your Thanksgiving dinner:
Thanksgiving Day is the time to gather with your friends and family, turn on some football, and enjoy your Thanksgiving meal. Plan ahead and have a wonderful stress-free Thanksgiving dinner:
Thanksgiving Turkey - Do you know that a frozen turkey is fresher than a fresh turkey? Hints and tips on preparing your Thanksgiving turkey.
Thanksgiving Planning - Have a Stress-Free Thanksgiving - The Thanksgiving dinner is a simple meal to prepare. All it takes to pull it off is some advance planning. The best advice is to write down everything you'll do and then prioritize according to your needs and schedule. And, above all, give yourself ample time to prepare everything; do not "rush things."
Thanksgiving Turkey Dinner Menu (with recipes) - Check out some ideas and recipe for your Thanksgiving dinner menu.

To take and view more, Brineing Guidelines

Monday, October 26, 2015

Kellie's Blueberry Homemade Syrup And French Toast


Have a recipe that you would like to take and either Multiply OR Divide, then take and check the following recipe multiplier and divider tool out by Clicking Here just a matter of copy and paste the recipe and when your done hit a button check it out today:
Print Friendly and PDF 


Kellie's Homemade Blueberry Syrup:


Kellie's recipe for Homemade blueberr syrup that you will love, try it out for yourself and see if you agree?

A simple and easy homemade Blueberry syrup recipe

Instructions:

1cup sugar
2 tbsp cornstarch
1 cup water
1 cup blueberrys
i tbsp butter


Directions:

combine sugar, constarch amnd water and boil over med heat for 3 min stirring constantly, stir in blueberrys and reduce heat..simmer 8 to 10 minutes or untill blueberrys burst,,,stir in butter untill melted..


Kellie's Blueberry French Toast Recipe:

Here is Kellie's homemade recipe for her blueberry french toast recipe that goes with the homade blueberry syrup recipe. So take and give them both a try and have a real treat.


Ingredients:


1 (1lb) loaf italian bread cut into 1inch cubes
1 (8oz) package cream cheese, diced into small cubes
1 cup of fresh blueberrys
12 eggs
2 cups milk
1/3 cup maple syrup


Directions:


Place half of the bread cubes in a lightly greased 13x9 inch baking dish.


Sprinkle cream cheese on top of the bread cubes, top with 1cup blueberrys and remainingbread..


In a large bowl beat together eggs, milk and maplesyrup..


Pour over bread..cover with foil and refrigerate over night


The next day remove pan from fridge, let stand for 30 minutes before baking..


Preheat oven 350 place covered pan into oven and bake 30 minutes then uncover and bake 30 min more untill golden brown and the center is set.


Read more: http://www.cooking-with-us.com/kelliesblueberrysyrupandfrenchtoast.php#ixzz3phkCDBxH

Monday, September 14, 2015

Vick's Vapor Rub TIP For Coughs

Vick's Vapor Rub TIP For Coughs


Awesome! Have you tried this?


Share with your friends so they have some on Hand before cold Season Starts!Some people have used Vicks Vapo rub for years for everything from chapped lips to sore toes and many body parts in between. But one usage is getting a lot of attention lately because studies show that it works 100% of the time.Scientists are not sure how or why it works, but it does. And it works every time.


To stop night time coughing, you put Vicks Vapo rub generously on the bottom of both feet at bedtime, then cover with socks.Even persistent, heavy, deep coughing will stop in about 5 minutes and will stay suppressed for up to 8 hours of relief.Studies show that it is more effective in children than some of the strongest prescription cough medicines on the market today. In addition, it has a soothing and comforting effect that brings on a sound and peaceful sleep.


Apple Pie Bars


Apple Pie Bars

Looking for a quick and easy snack idea for the kids OR a simple and easy dessert idea? Try the following apple pie bars sure to be a hit.


For the Crust you will need:


1 egg
2 sticks of butter softened
1/2 cup sugar
2 cups of flour
1/2 tsp salt
For the Filling you will need:
4 large apples, peeled, cored and sliced
4 tablespoons melted butter
1/2 Cup brown sugar
2 tsps cinnamon
1/2 tsp nutmeg
For the Topping you will need :
2/3 cup brown sugar
2/3 cup flour
4 tablespoons butter melted


What you do:

1.Preheat oven to 350... line a 13 x 9 pan with parchment paper and set aside
2.Make your crust in a large bowl,, combine the egg, butter and sugar,, mix till creamy.
3.Add flour and salt... stir well... Flour your fingers and press the dough evenly in the prepared pan... bake for 15 min.
4.Make your filling in a large bowl combine apples butter , brown sugar, cinnamon and nutmeg... stir well.. pour over crust
5.Make your topping in a small bowl and spread over filling
6.Bake an additional 30 min.... let cool cut and enjoy


Also try one of the following:  Apple Crisp   Apple Pie Mini Muffins   Apple Fritters


Read more: http://www.cooking-with-us.com/applepiebars.php#ixzz3lj3yBoW4

Tuesday, August 4, 2015

Hot Fudge Pie


Have
a recipe that you would like to take and either Multiply OR Divide,
then take and check the following recipe multiplier and divider tool out
by Clicking Here just a matter of copy and paste the recipe and when
your done hit a button check it out today:


Print Friendly and PDF


HOT FUDGE PIE


If you love chocolate, then this is for you. It is oh so gooey and delicious....


Keywords, hot fudge pie, chocolate, easy pie recipes, simple desserts,
kids, fun pies, kids, eas and quick dessert ideas, simple pies


Ingredients:


1 stick butter, softened

1 c sugar

2 eggs

1 tsp vanilla

3 Tbsp cocoa powder

1 tsp salt

1/2 c all purpose flour


Instructions:


Preheat oven to 350 degrees.


Cream together butter and sugar with electric mixer until fluffy, about 3
minutes. Add eggs and vanilla and mix well. Add cocoa powder, salt and
flour and stir until well combined.


Grease 8 inch pie pan with butter or cooking spray, pour mixture into pie pan. Bake 30 to 35 minutes until center is set.


Friday, July 31, 2015

Breakfast Recipe's

Looking
for some new and simple ideas for breakfast or a snew and different
quick and simple supper idea, then why not take and stop on by and view
the different simple breakfast recipes from the site. Or if you have a
family favorite of your own that you would like to take and share with
everyone else to the site f
eel free to take and use the
button above to fill out the recipe submission form. And it will be
added at no cost to you for everyone else to try for them and there
families. If you would like to get a whole over view of the site you can
take and view our
Site Map and
view everything from one location. Also if you are in the need to get
some new cookware or bake ware etc then don't forget to stop on by
Our Amazon Store

and find some great deals for your home both inside and out. Find
cookbooks kitchen gadgets, table ware, appliances and a whole lot more.
Also take and stop on by the coffee Cake Recipes.


Friday, June 12, 2015

How to make a candle out of an orange or grapefruit

This instructable will show how to make a candle from any citrus and kitchen oil in minutes. Along with pictures to show you step by step on how to make it, to take and view how to make your own click the following link...... http://www.instructables.com/id/Orange-Candle/


Wednesday, June 10, 2015

Crab Rangoon


Take a moment to check out the Site Map
and view the whole site from a single location and check out all the
simple and quick recipes on the whole site from one spot. Don't forget
to stop on by and visit
Our Online Store for some great deals for your whole home inside and out.


Have
a recipe that you would like to take and either Multiply OR Divide,
then take and check the following recipe multiplier and divider tool out
by Clicking Here just a matter of copy and paste the recipe and when
your done hit a button check it out today:


Print Friendly and PDF


Crab Rangoon


Recipe by LunarCrystal


This is said to be the closest to the rangoon served at a certain Asian
food chain. The rangoon can also be deep-fried instead of baked.


Ingredients:


1 clove garlic, minced

1 (8 ounce) package cream cheese

1 (6 ounce) can crabmeat, drained and

flaked


2 green onions with tops, thinly sliced

2 teaspoons Worcestershire sauce

1/2 teaspoon light soy sauce

48 wonton wrappers


Directions:


1. Preheat an oven to 425 degrees F (220 degrees C). Lightly spray baking sheet with cooking spray.


2. Combine garlic, cream cheese, crab, green onions, Worcestershire
sauce, and soy sauce in a bowl. To prevent wonton skins from drying,
prepare only 1 or 2 rangoon at a time. Place 1 teaspoon of filling onto
the center of each wonton skin. Moisten the edges with water and fold
the wonton skin diagonally to form a triangle, pressing edges to seal.
Moisten one of the bottom corners. Create a crown by pulling both bottom
corners together and sealing. Arrange the rangoon on the baking sheet
and lightly spray with cooking spray.


3. Bake in the preheated oven until golden brown, 12 to 15 minutes.


---------------------------------------------------------


Sweet and Sour Sauce


An excellent, traditional sweet and sour sauce. It is great served with meatballs, with tempura, or even over rice


Ingredients:


3/4 cup white sugar

1/3 cup white vinegar

2/3 cup water


1/4 cup soy sauce

1 tablespoon ketchup

2 tablespoons cornstarch


Directions:


1. Place the sugar, vinegar, water, soy sauce, ketchup and cornstarch
in a medium saucepan, and bring to a boil. Stir continuously until the
mixture has thickened.


Friday, May 15, 2015

Dip Recipes:


Looking
for a quick idea for dinner, then take and try one of the following
chicken recipes from the site or one of the many other simple supper
suggestions that make an ideal and simple dinner idea tonight. You can
browse over our Site Map
Here and browse the whole site at a glance. If you have a favorite
recipe then please taker and send it to us to add for other visitors to
the site to try out for themselves and there family. Also stop on by the
On Site Store and pick up some new bakeware and or some pots and pans or a pressure cooker and much, much more stop on by today.


BLT Dip:

Here's a simple and easy recipe that is sure to be a hit at your next
party or gathering try the following BLT dip today from here and see if
your guests and or family dont ask you for the recipe for this easy dip
recipe idea.


Creamy Chile Dip


"We wanted a quick simple dip to make tonight for New Years Eve. This
recipe fit the bill. We used a hollowed round bread for its serving bowl
and added some olives for decor."


Hot Taco Dip:

Here is a simple and easy recipe for a hot taco dip perfect for your
next party, game day recipe or anytime snack idea. Goes great with
movies kids will love it to.


Spinach Dip:


Are you looking for a really simple and delicious spinach dip recipe? TGI Friday's Spinach Dip Recipe. Think you can duplicate?


Spinach-Artichoke Dip (Chicago Style)


Looking fo an easy and simple game dip idea or simple dip anytime? Then
try this spinach and artichoke dip Chicago Style. "I was worried that it
would be a little bland without any seasoning. I added a pinch of
cayenne and white pepper and it is so yummy!"


Friday, April 3, 2015

Peanut Butter Chocolate Eggs


Havea recipe that you would like to take and either Multiply OR Divide, then take and check the following recipe multiplier and divider tool outby Clicking Here just a matter of copy and paste the recipe and when your done hit a button check it out today:


Print Friendly and PDF


Peanut Butter Eggs:


Here is a simple peanut butter chocolate eggs just in time for Easter
time. Makes a fun and easy kid friendly recipe to make with the kids
this Easter holiday or anytime of the year.


Ingredients:


1 lb. (about 3 1/2 cups) powdered sugar

1 1/2 cups peanut butter...

4 oz. cream cheese

1/2 cup butter or marg, softened

1/2 tsp. vanilla


Directions:


Mix together with hands until thoroughly blended. Shape into eggs. Chill until firm. Dip in chocolate coating.


To melt chocolate for coating, a crockpot on low heat works well. It keeps the chocolate at a uniform heat.


Sunday, March 1, 2015

Simple Stain Removal

Works on every stain I've tried it on !!!

The ultimate stain remover that actually works on a seriously set in stain! Never buy oxyclean again!...

The mixture is:

1 tsp. Dawn dishwashing detergent
3-4 tablespoons of hydrogen peroxide
couple tablespoons of baking soda.
Scrub on with a scrubbing brush

Share to save this awesome recipe!


Clean and freshen dishwasher


·
 

Clean and Freshen the Dishwasher!! I am so LOVING This!!

We want the dishwasher to clean our dishes...SO....Clean and freshen
the dishwasher itself too.... it can do a better job!! Here's how:
1) Remove the bottom rack and look for 'lost' items, hard items and 'chunks' in the bottom and around the mechanisms.
Check the screen.
2) Put a cup of vinegar on the top shelf...
Run a cycle - hot water of course
3) Sprinkle about a cup of baking soda over the bottom of the dishwasher
Run through a short cycle
That's it! Cleaned and freshened up, your dishwasher will look better, smell better and do a better job.

**Note: If you really want to go at it with gusto, you can take the
mechanism apart and clean it in the sink with vinegar before you run the
first cycle
✿ CLICK & SHARE ✿

Friday, February 27, 2015

Parmesan Baked Pork Chops


Print Friendly and PDF


Parmesan Baked Pork Chops


Need a really quick and easy supper idea, Then take a minute to check
the following recipe out. These were the best pork chops I have eaten in
a long time. So moist and tender and the flavors were amazing!


Serves: 4

Prep Time: 5 Min

Cook Time: 45 Min

Cooking Method: Bake


Ingredients:


4 boneless pork chops, 1/2" thick

1 Tbsp olive oil

1 c parmesan cheese

1 c Italian bread crumbs

1 tsp black pepper

1 tsp garlic powder


Directions


On a plate combine the last 4 ingredients. Rub the pork chops with olive
oil and then dip (coat) each one in the cheese mixture. Press the
mixture over the pork chops to make sure they are well covered in it.
Line a pan with tin foil and spray with cooking spray. Place the pork
chops on the pan and bake at 350 degrees for 40-45 minutes.


Potato Round Bites

Print Friendly and PDF


POTATO ROUNDS/BITES


Here is a simple and delicious potato dish or side dish recipe. Goes
great with everything you might make for supper OR by itself try this
one out today.


Ingredients:


2 large unpeeled baking potatoes

Olive oil ( can use canola or vegetable)

1 cup (4oz) Colby/Monterey Jack Cheese

6 bacon slices

1/3 cup green onions (optional.. My kids don't like them so I don't use them~ so they aren't shown in the picture)

1/4cup BBQ sauce ( any kind you like... I use Kraft hickory honey smoked)


Directions:


Preheat oven to 450degrees

Cut potatoes into 1/4 inch slices. Brush both sides with oil. Place on a
baking sheet with edges. Bake for 20 minutes or until lightly browned
then remove from oven.

While potatoes in the oven: cook bacon on stovetop until crisp, drain
and crumble. In a medium bowl combine bacon, cheese and sliced green
oinion and toss together.


With a basting brush, brush each potato slice with BBQ sauce and
sprinkle cheese mixture on top. Bake 3-5 minutes until cheese melted!!


Can be used as an appetizer or as a side to a meal.


Enjoy!!!


Wednesday, January 14, 2015

French Silk Pie

Print Friendly and PDF


French Silk Pie:


Need a fun and easy dessert recipe? Want some that will be a big hit,
then take a minute and check the following french silk pie recipe for a
simple dessert recipe idea.


Ingredients


(9-inch pie):

Crust


2 1/2 cups Oreo cookie crumbs

1 stick unsalted butter, melted

Filling

1/2 cup granulated sugar

2 large eggs, lightly beaten

70 grams dark chocolate, melted

1 stick unsalted butter, softened

1 1/2 cups whipping cream

2 teaspoons vanilla extract

1 tablespoon shaved dark chocolate


Directions:


Preheat oven to 350F. Grease a 9-inch tart pan or springform pan.


To prepare crust, mix Oreo cookies crumbs and melted butter in a small
bowl, until a moist yet crumbly mixture forms. Firmly press the mixture
into the bottom and sides of the pan.


Bake for 10 minutes. Let cool completely on a wire rack.


To prepare filling, cook sugar and eggs in a medium heat-proof set over a
pot of barely simmering water, keep whisking until thick enough to coat
the back of a spoon, about 5 minutes.


Stir the melted chocolate into the mixture until smooth. Remove from heat and set aside until completely cooled.


In the bowl of a standing mixer fitted with the paddle attachment, beat
the butter until light and fluffy. Add the cooled chocolate mixture and
continue beating until fully combined.


In another bowl, beat the cream and vanilla until it holds firm peaks.
Reserve about half cup for garnish. Gently fold the remaining whipped
cream into the chocolate mixture until incorporated and the mixture is
light and fluffy.


Pour the mixture in the crust. Smooth the top with a spatula. Refrigerate the pies until set, at least 4 hours.


Remove pie from pan, top with the reserved whipped cream and shaved chocolate. Serve.